Overview of Exchange migration
Effortlessly streamline the migration of mails, contacts, tasks and calendars from Exchange Server to Exchange Online using ManageEngine Exchange Reporter Plus, and facilitate the seamless transition of your organization's on-premises mailboxes. Personalize the migration process using migration filters so you can choose the folders to exclude. You can also utilize the time-based filter which helps you decide whether to migrate all items at once, or select a time either before or after a particular date. Exchange Reporter Plus ensures uninterrupted communication as you shift to the cloud.
Creating a new Exchange migration schedule
- Go to the Migration tab.
- To configure your first migration schedule, click the Configure Migration button located at the bottom of the screen.
- Enter a name in the Migration Job Name field.
- Select the organization for which you want to generate a migration schedule from the Source Exchange Organization drop-down.
- Choose the Microsoft 365 tenant for which you want to create a migration schedule from the Target M365 Tenant drop-down.
- Select the mailboxes to be migrated either by entering the names or by uploading a CSV file containing the source and Target Primary SMTP Address(es). If you choose to enter multiple names manually, then make sure these names are separated by a comma. You can leave the Find the Mailboxes field blank to view all the mailboxes.
Note: The target primary SMTP address is optional. If a target SMTP address is not provided, the product will search for a match based on the attributes set in the Mailbox Mapping field.
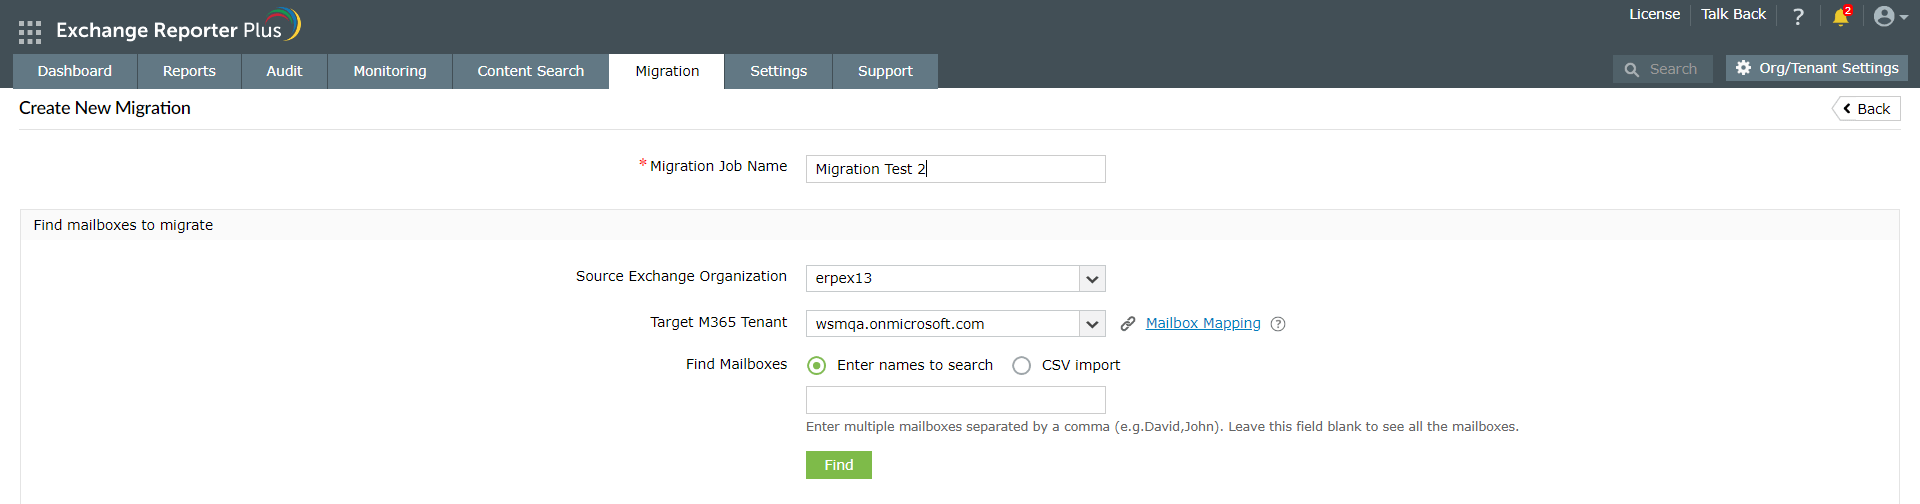
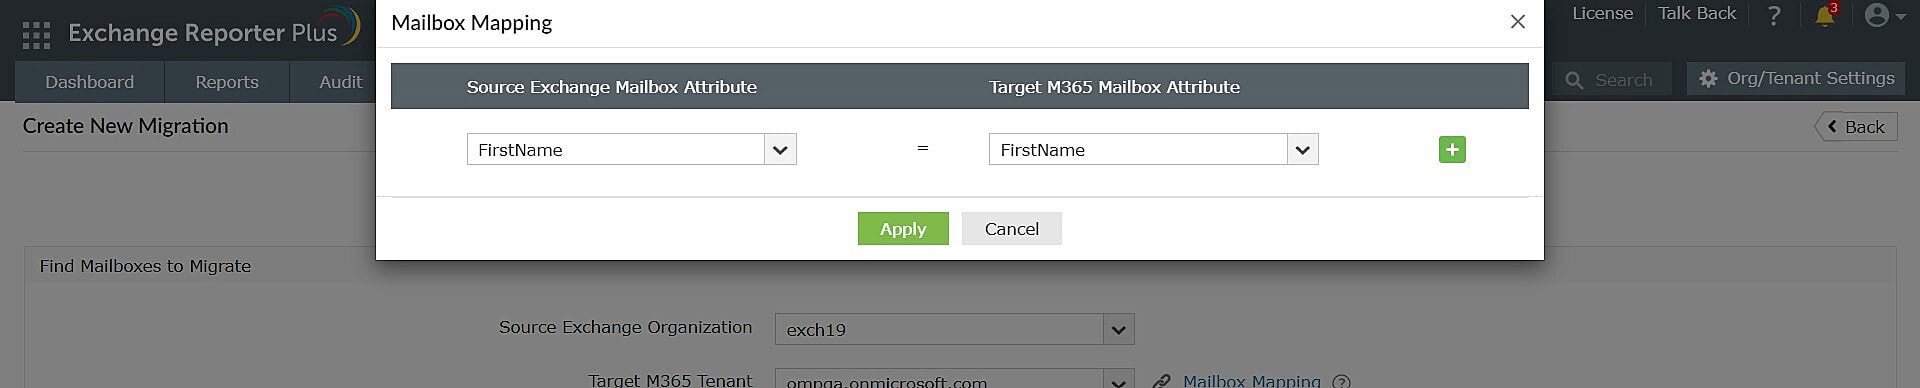
- You can match existing mailboxes between the Source Exchange Organization and the Target M365 Tenant using custom or already available attributes in the Mailbox Mapping pop-up.
For example, to migrate the mailbox of a user with the first name "John", select the Mailbox Mapping option and set both the Source Exchange Mailbox and Target Microsoft 365 Mailbox Attribute as FirstName and click Apply. The product will compare the first name attribute of all users in the Exchange Server and Exchange Online environment. If "John" exists in the target Microsoft 365 environment, it will be listed under Matched Items.
- Click Find or Import depending on whether you have chosen to type the names manually or decided to import a CSV file.
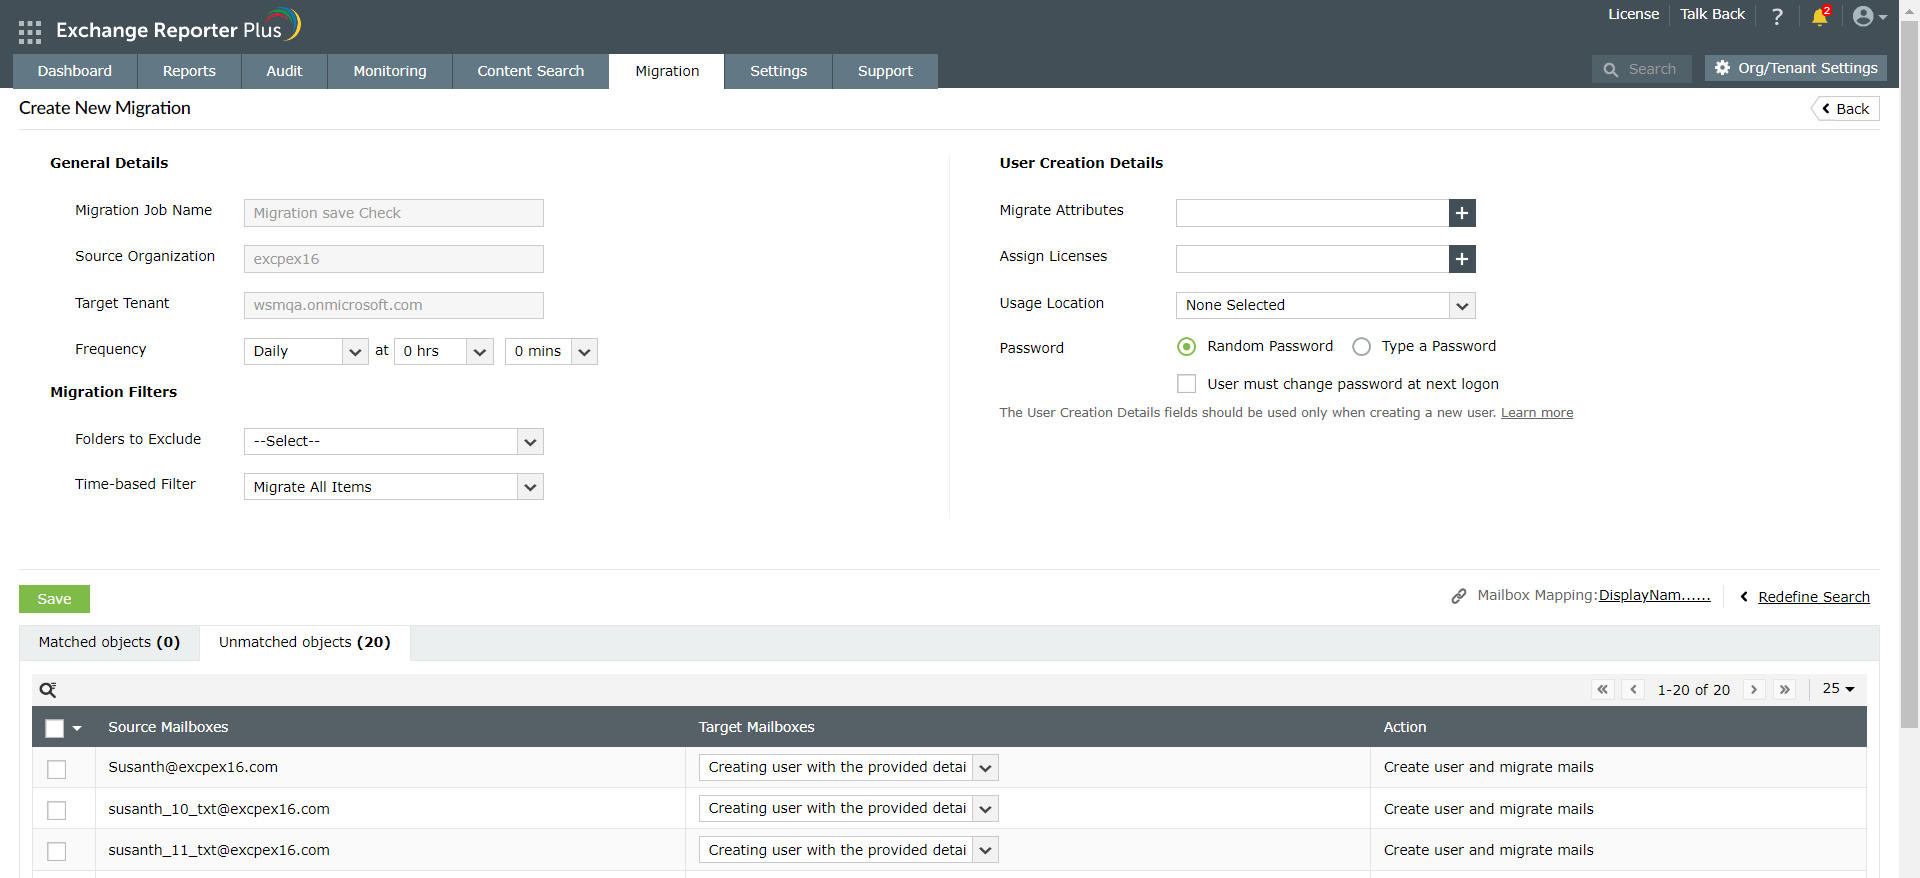
- The General Details section enables you to view details regarding the migration and the Frequency at which the migration schedule will run. It shows the fields like Migration Job Name, Source Organization, and the Target Tenant. If you need to make changes to these fields or redefine the search, then you need to use the Redefine Search option present on the right side of the screen.
- The Migration Filters section enables you to choose the folders which you would like to exclude from the migration process, and to set a time-based filter.
- Migrate all Items: Migrate all the mails from the source mailbox to target mailbox.
- Migrate Items after the Date: Migrate all the mails after the selected date.
- Migrate Items before the Date: Migrate all the mails before the selected date.
- The User Creation Details section, which is used only for creating a new user, enables you to migrate attributes, assign Microsoft 365 licenses, set a usage location, and determine whether you would like a random password or a custom password of your choice. Once you have decided on the password setting, you can choose whether the user will be forced to change their password on their first login.
- On the bottom of the screen, you can see mailboxes depending on whether they match the Mailbox Mapping attribute.
- Matched Objects: Lists the source and target address of the mailboxes and shows what action will be performed during the migration procedure.
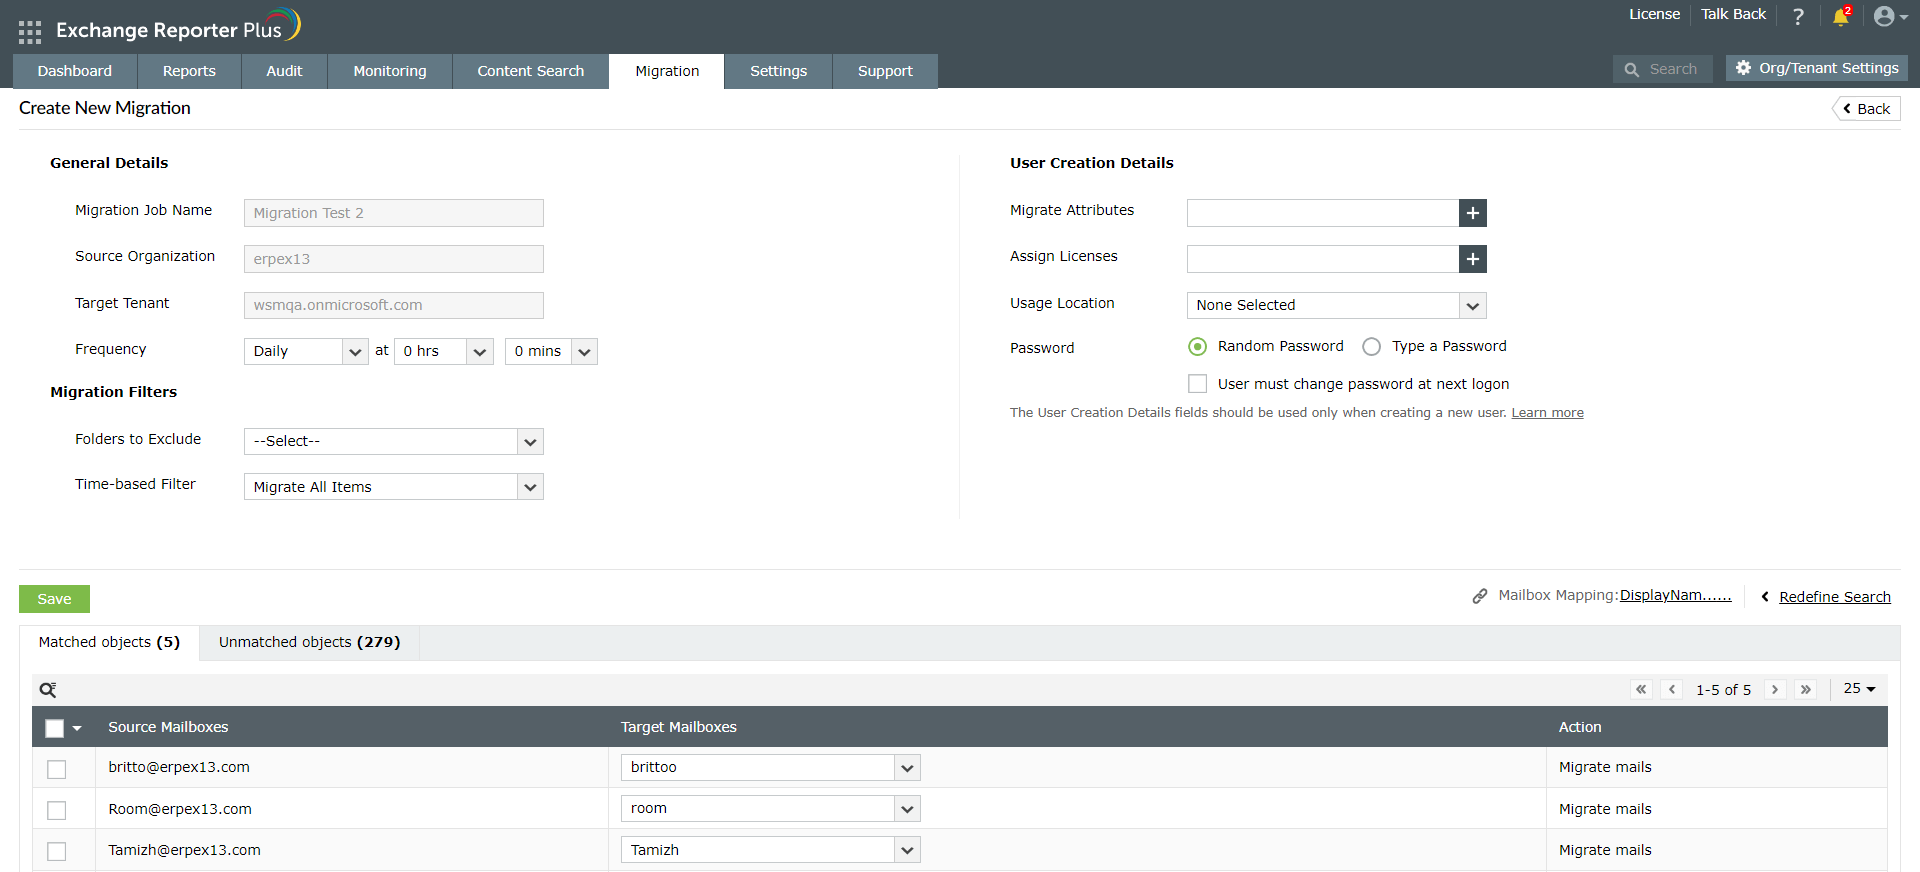
- Unmatched Objects: Lists the source address of the mailboxes and shows what action will be performed during the migration procedure.
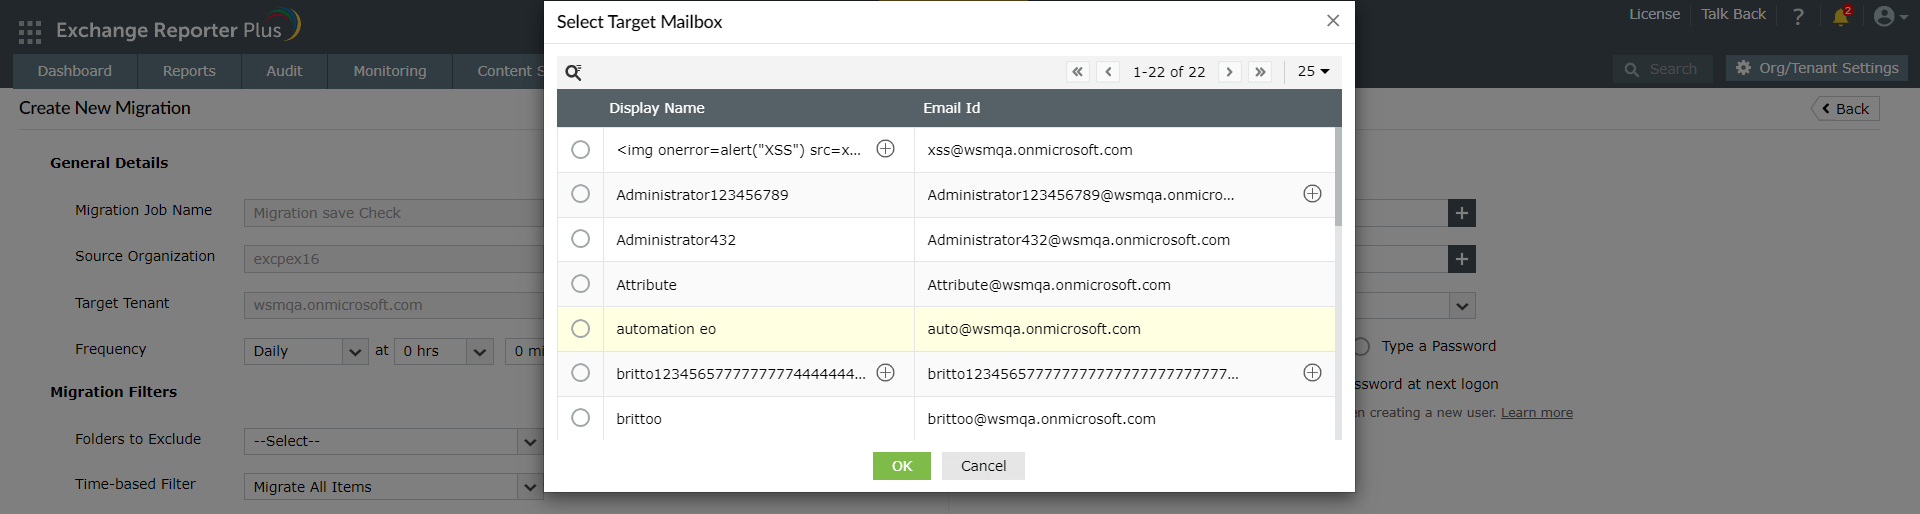
- Click the Target Mailboxes field to choose whether you would like to select an existing user, or to create a new user for migration.
- Choose an existing user: Select the target mailbox of an existing user from the configured tenant in the pop-up.
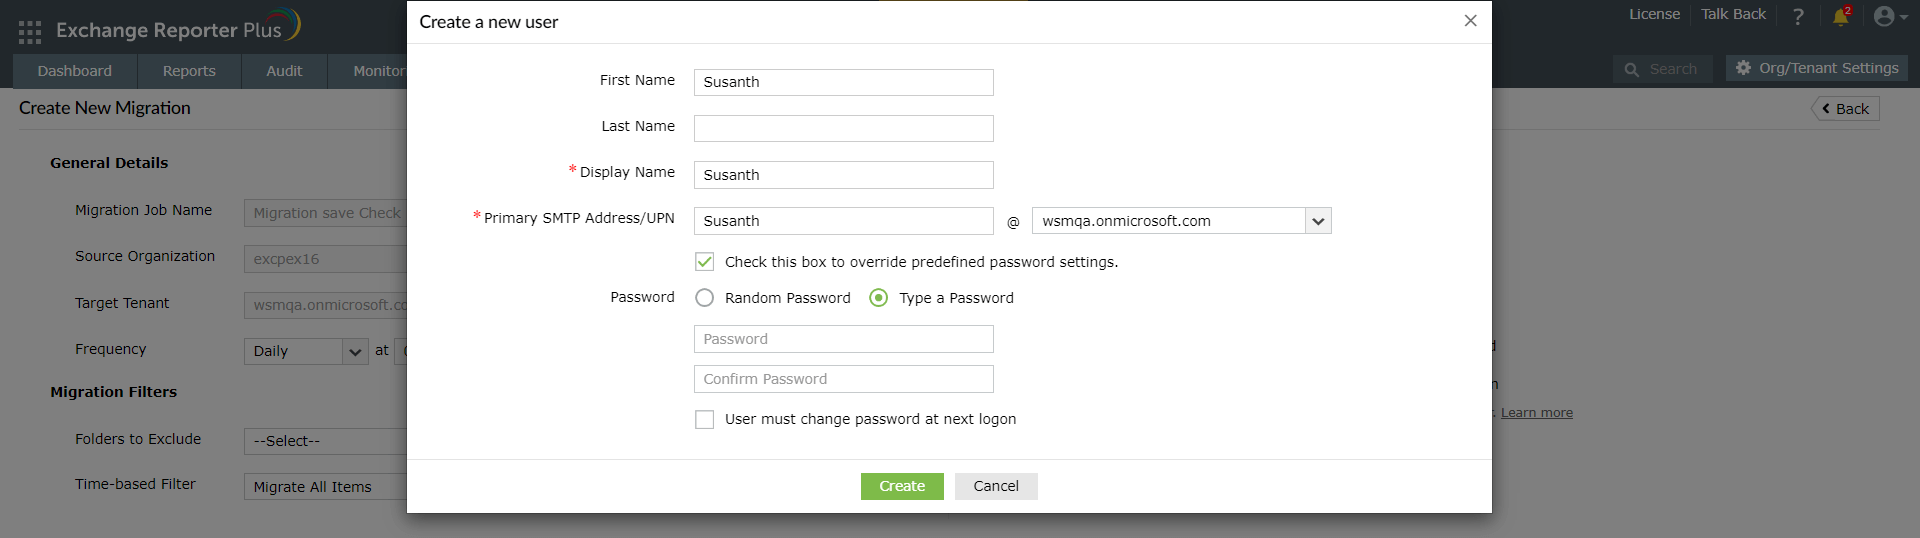
- Create a new user: The product will automatically fill in the required fields based on the Source mailbox like the displayname attribute.You can also set a password different from the one set in the User Creation Details section by selecting Check this box to override predefined password settings, and then selecting whether to give a random password, or to use a specific password of your choice.
- Select the mailboxes that you would like to migrate from Matched objects and Unmatched objects respectively. You can view the selected list of mailboxes by clicking the number displayed next to the Save button.
- Click Save to retain the migration schedule. The migrated mailboxes you selected in Step 14 will run at the specified period.
Note: You are restricted to two schedules, 25 selectable mailboxes, and five items per each mailbox folder in each edition except the Professional edition.
You will be redirected to the Migration Schedules page, which gives you an overview of the migration jobs that you have scheduled so far. In addition, it enables you to view the following information and perform additional functions as well.

- The Action column enables you to perform the following functions:
- Click the
 icon to modify the migration schedule.
- Click the
 or
or  icon to enable or disable the migration schedule, respectively.
- Click the
 icon to delete the migration schedule.
- Click the History link under the Migration Job Name column to see the history of the scheduled migration jobs. The history includes details like the migration job name, the start and end time, the migrated items size (in MB), the count of the migrated items, the processed items, and the number of mailboxes selected for the migration. It includes the status of the schedule as well. To see the migration status, you can click the number present under the number of mailboxes column which will take you to the Schedule Status page.

- Click the Advanced option to set a size limit for the migration schedule in MB, or leave it blank if you don't want to set a size limit for migration.
- The Source Organization column shows the name of the source Exchange Server or Organization.
- The Target Tenant column shows the name of the target Microsoft 365 tenant.
- The Scheduler Time column shows the time when the particular migration job is scheduled to run. In case you would like to run a migration schedule manually, click Run Now below this column to trigger the migration process manually.
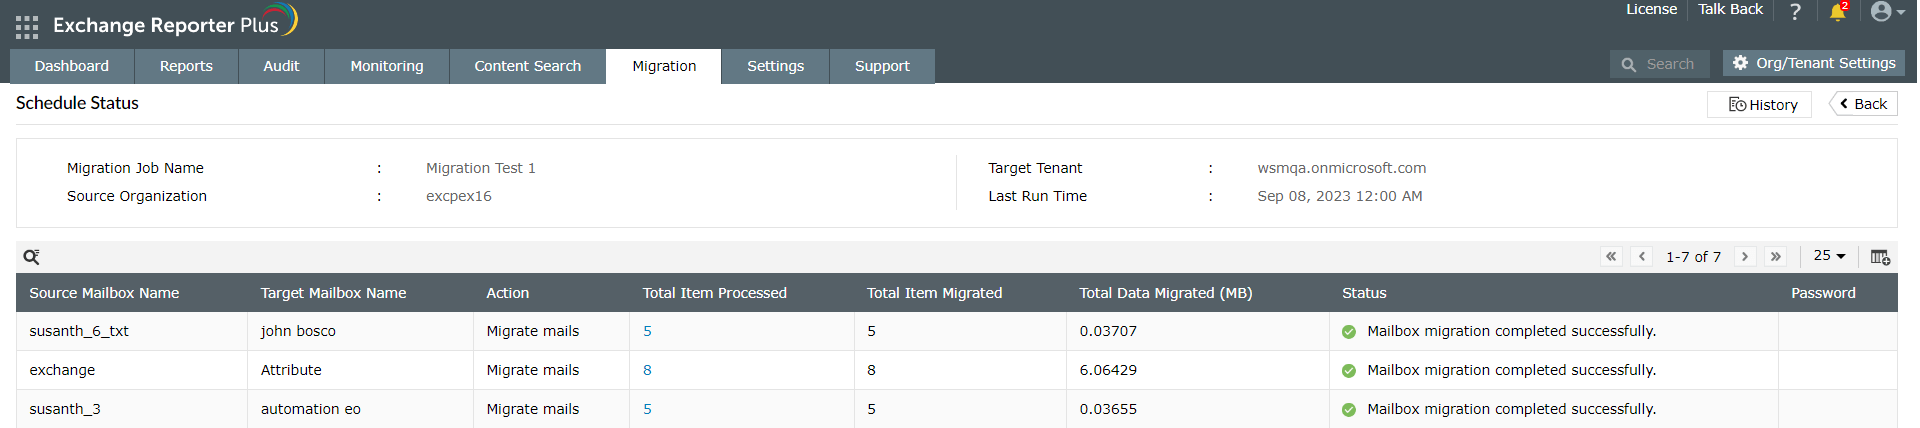
- Click the View link below Migration Status column to be taken to the Schedule Status page which shows details like the migration job name, the source organization, the target tenant name, and the last run time of the particular migration job. It also displays details regarding the schedule, including source and target mailbox name, the action which was taken during the particular migration, the total data migrated (in MB), the password of the newly migrated user, and the total number of migrated items. If a migration job fails, it will display the reason for failure under the Status column.
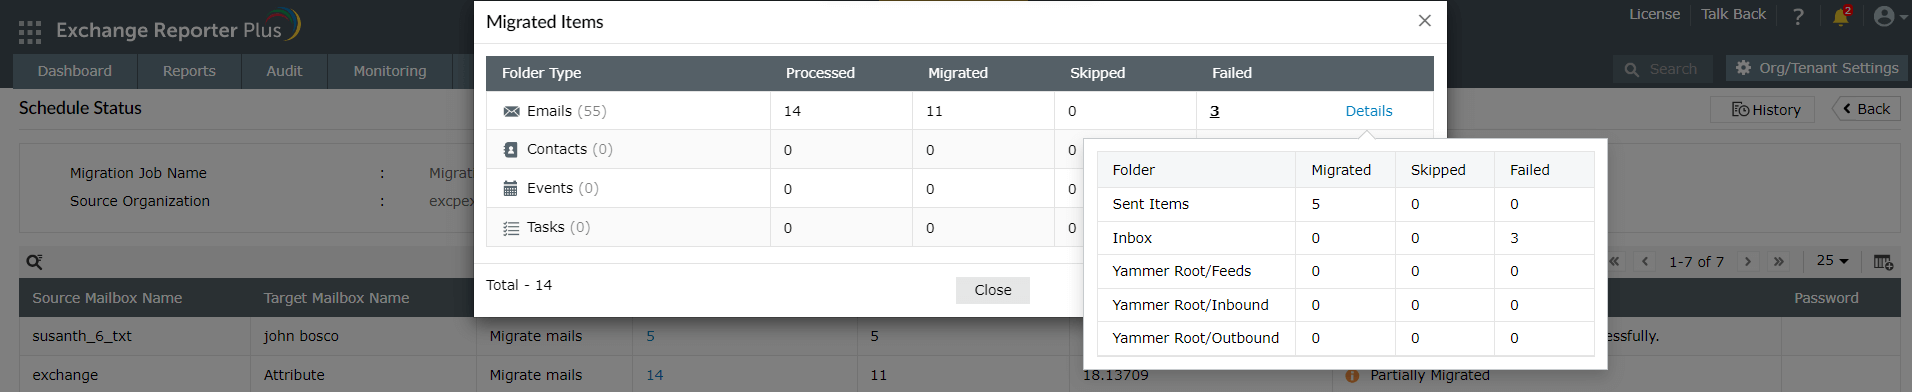
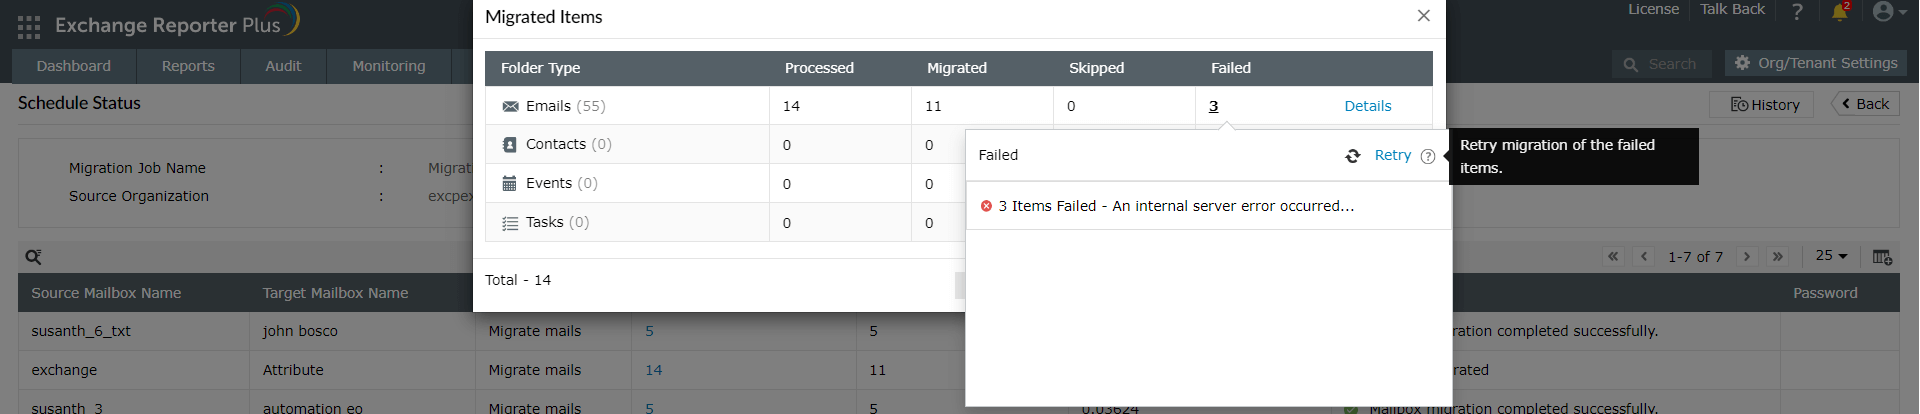
- Click the items under Total Items Processed to open the Migrated Items window where you can see the various categories of mailbox content in which the count within the brackets shows the total number of items within that particular content. While the Processed column shows the number of items that have been read by the product, the Migration column shows the number of items that have been successfully migrated. The Skipped column shows the number of items that have been skipped due to the size restriction set in the Advanced option under Migration Schedules. The Failed column shows the number of items that were unsuccessful in the migration process. Hovering over the Failed items count will display a pop-up which describes the reason for the migration failure and a Retry button which causes the migration schedule to retry migration for these items.
 ADManager Plus
 ADAudit Plus
 ADSelfService Plus
 M365 Manager Plus